
Background
I’ve been using a Coolermaster TKL layout mechanical keyboard with Cherry MX Blue switches (the loud tactile clicky ones) for quite a while now, but I was recently inspired by Taeha Types and Andy V Nguyen on YouTube to look into building my own mechanical keyboard. I went down the rabbithole and decided to document the experience here.
Taeha Types has a great starting point video explaining everything that goes into a mechanical keyboard.
Components
Keyboard case
I decided to go with a 75% layout because I wanted something more compact than my previous TKL layout, but I didn’t want to sacrifice the function or paging keys. I went with the KBD75v2 case with a brass plate. Brass is heavier and more rigid than aluminum or polycarbonate giving the keyboard a more stable feel. In addition to the KBD75v2 case and plate you need the KBD75v2 PCB to solder the switches into. There are other PCBs on the market that are hotwsappable meaning they can be plugged in and out without soldering. Some cases/plates have different mounting systems, but generally the switches snap through the plate into the PCB and get soldered in. Most kits have the case, plate and PCB all together but I think KBDFans stocks the PCB separately. Cases, plates and PCBs don’t necessarily fit together if they are the same layout because the placement of the USB port and mounting holes might not be compatible.
Switches
The number of switches on the market is definitely overwhelming. It’s difficult to decide on a switch because they differ in linear vs tactile movement, actuation/bottom out force, and how they sound. I wanted a linear switch that typed smoothly and sounded “thocky”. After watching one typing test after another on YouTube I settled on Gateron Black Inks. They have a little bit of a heavier resistance but are super smooth and sound great. The other switches that I found attractive were the Alpacas (hard to find in stock) and Tealios. There was a risk I’d be unhappy buying 90 Gateron Black Ink switches without trying them first (they were to be soldered into the board), but people seemed pleased with them in their builds. Make sure you order the right amount of switches for your layout because the name 75% doesn’t mean 75 switches, you need 84.
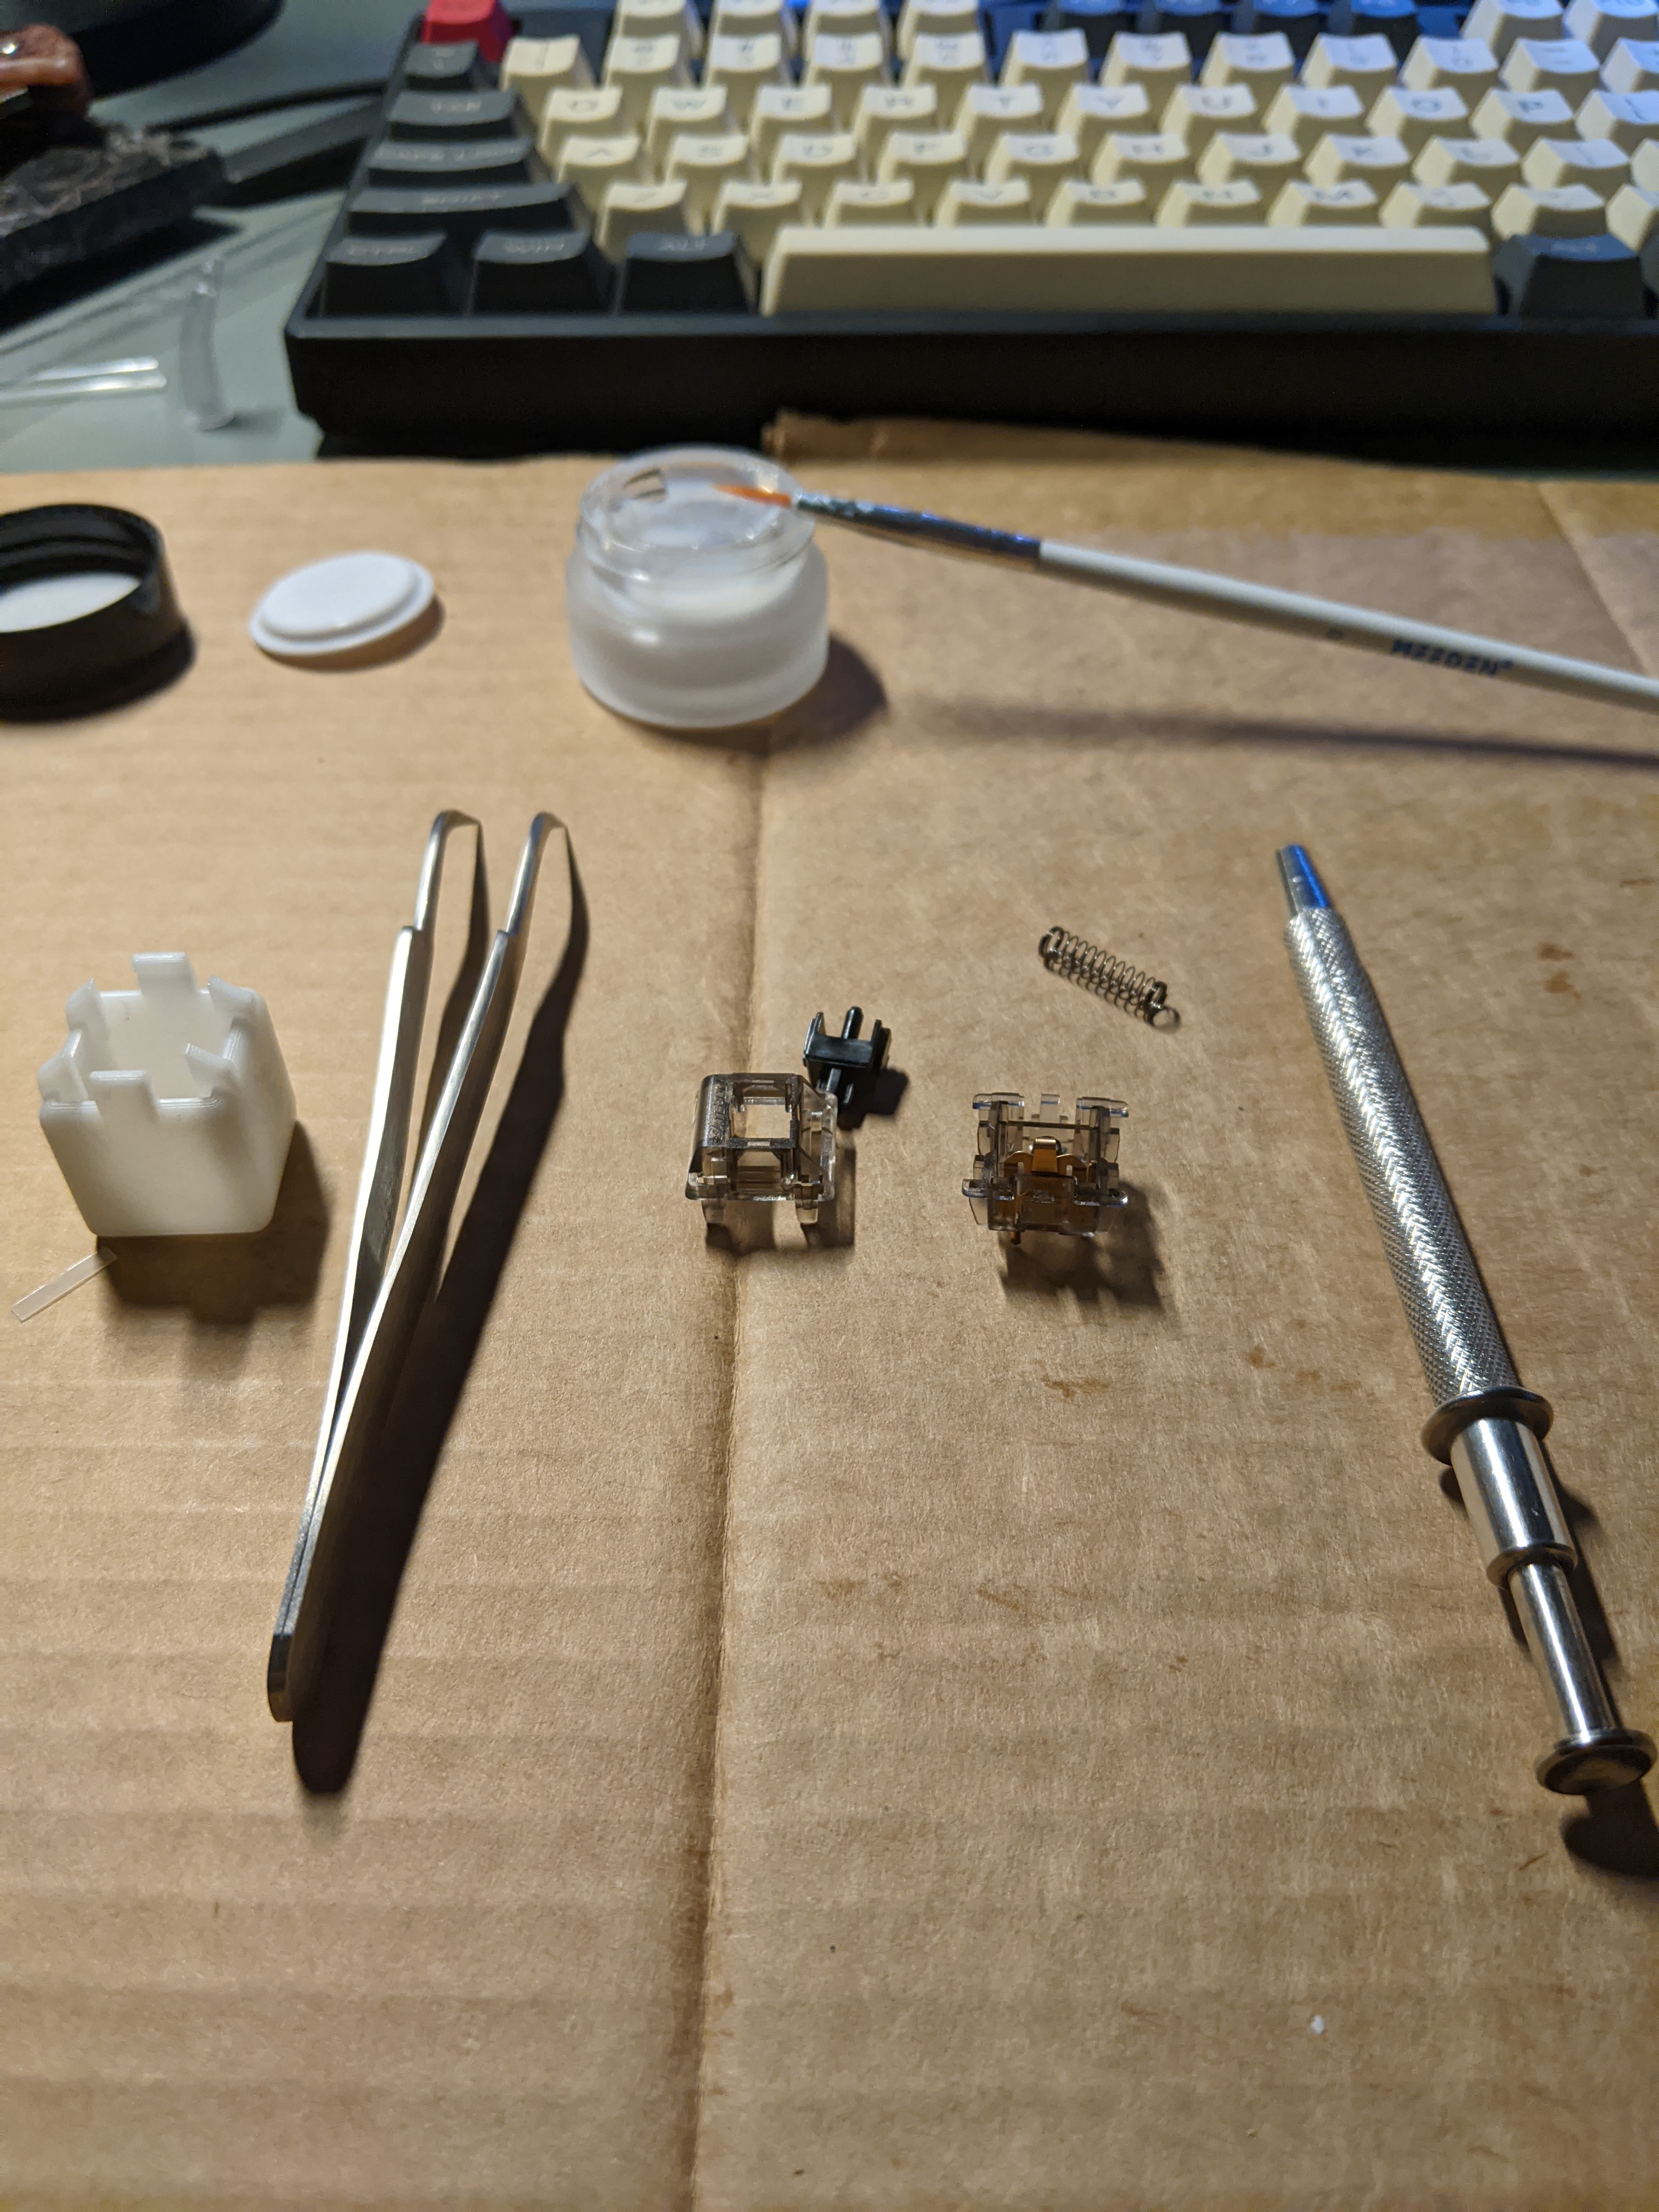
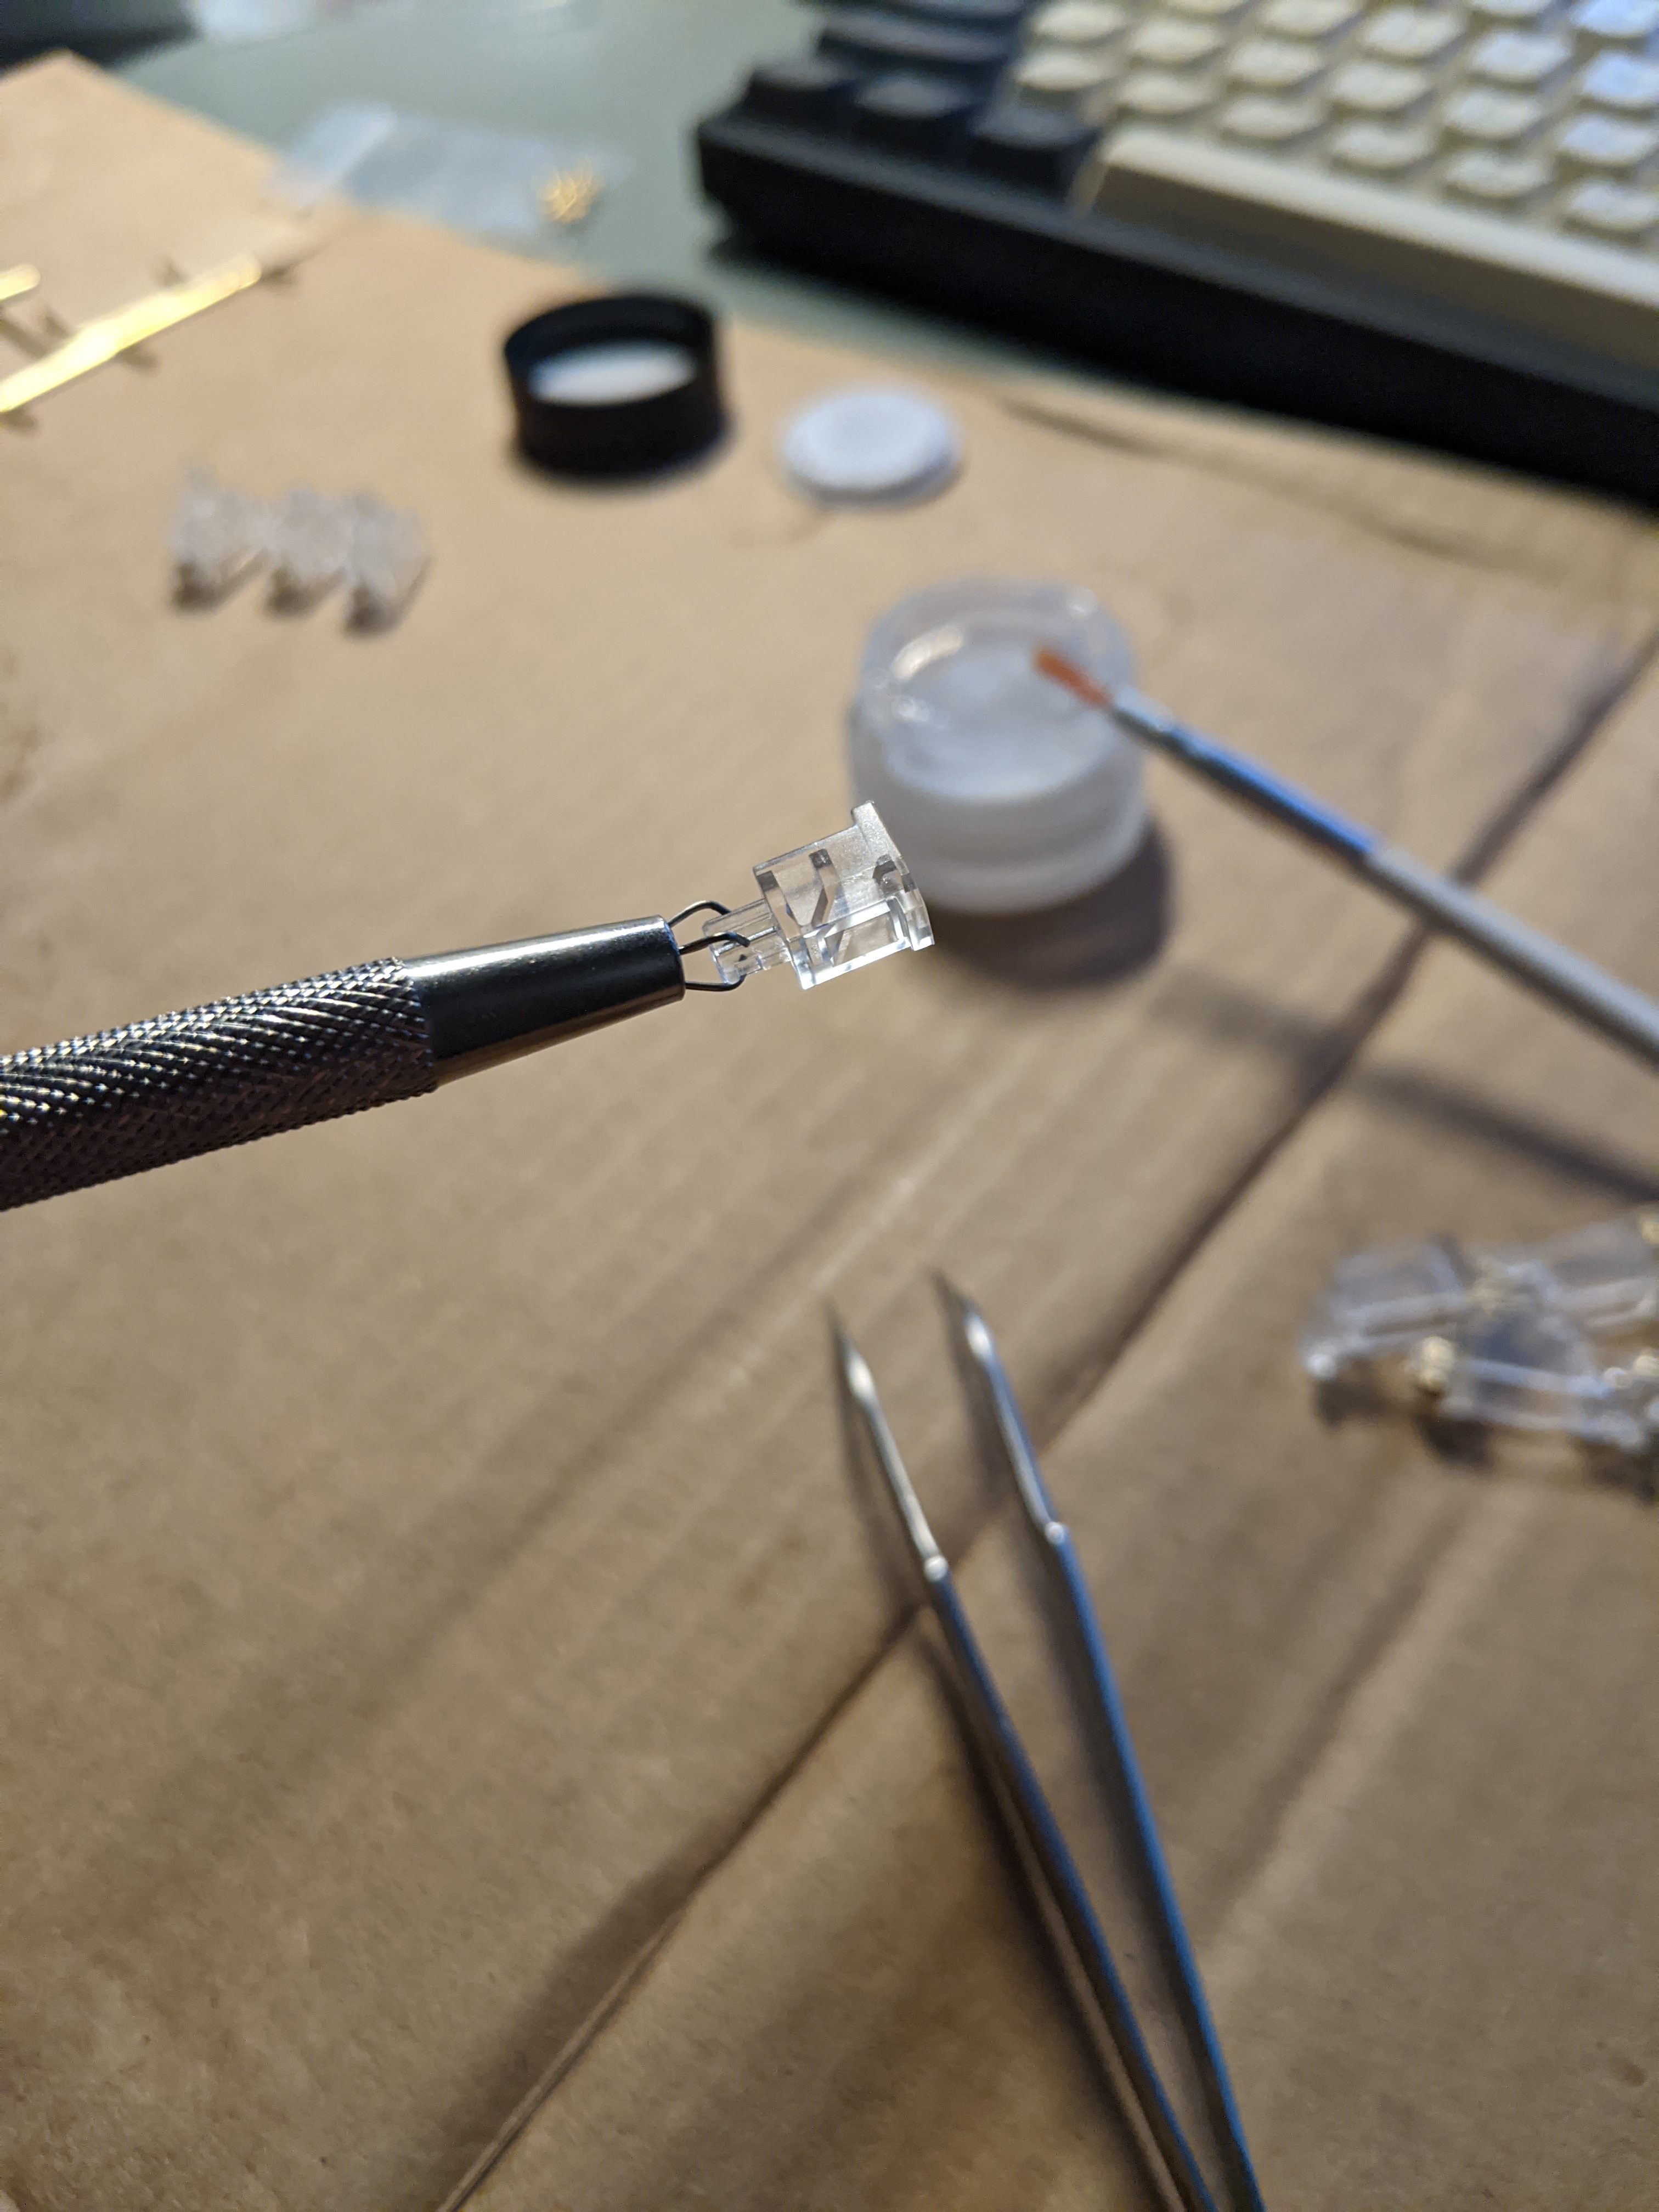
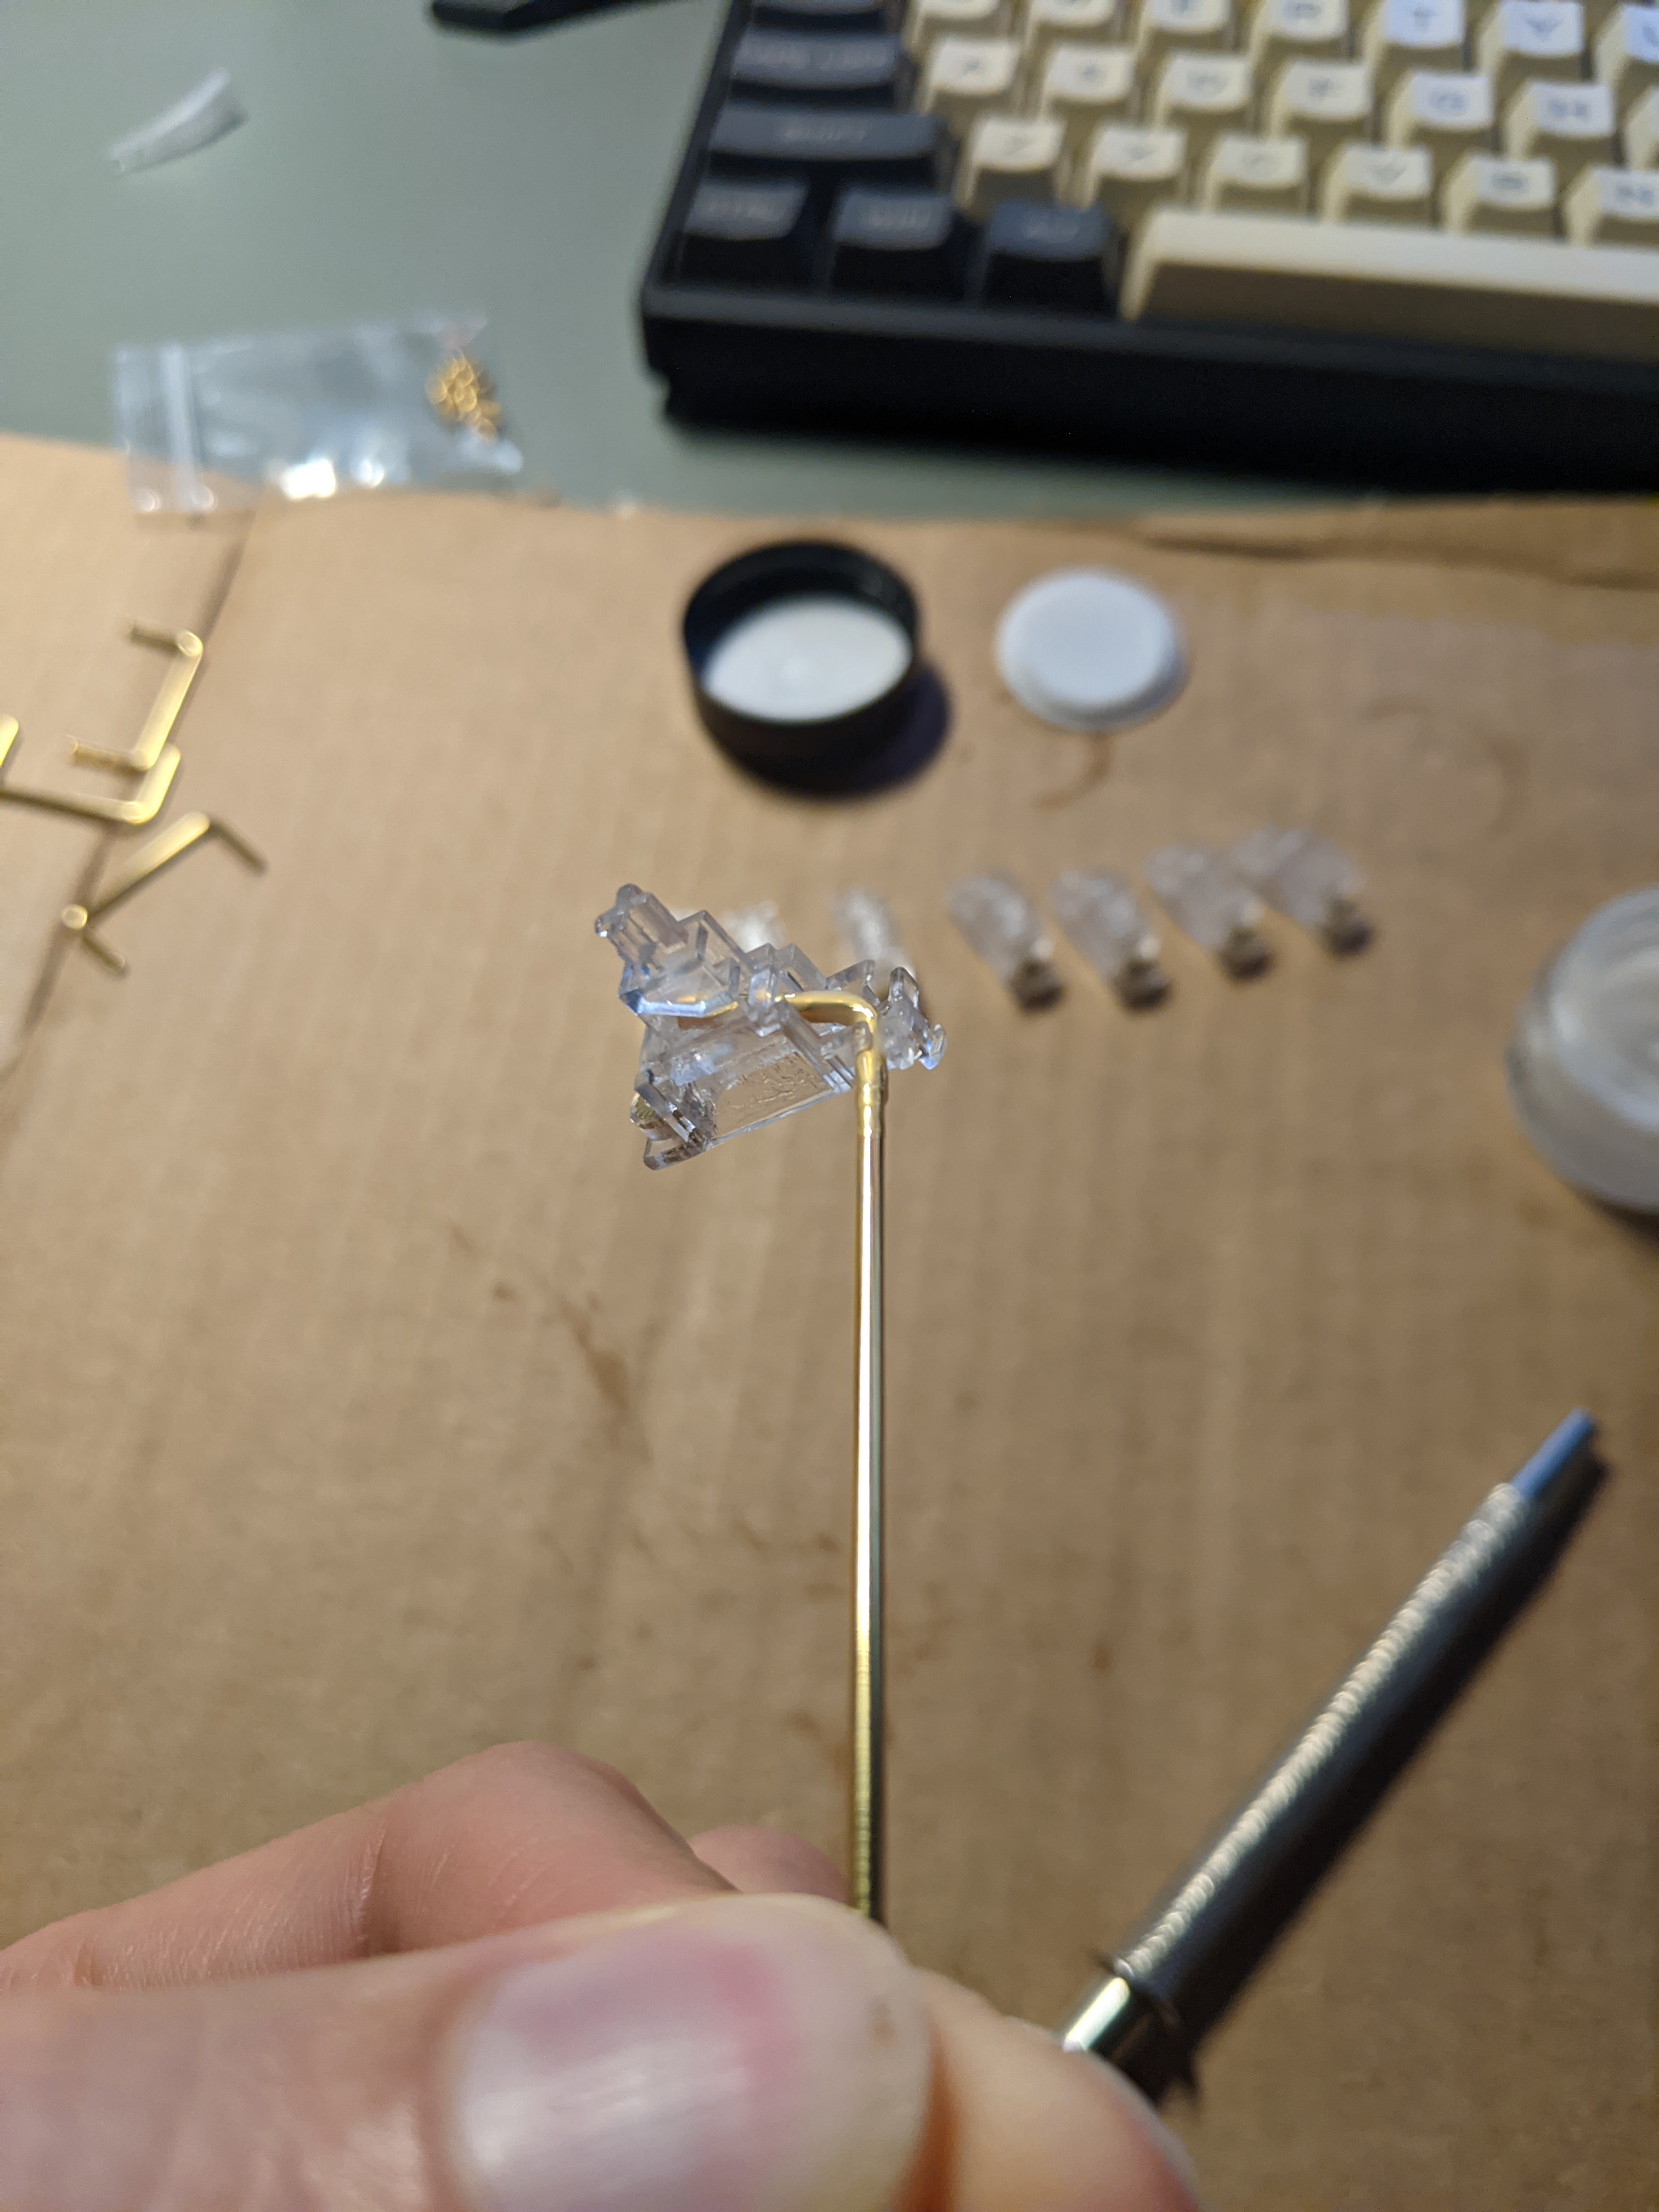
To improve the sound and feel of the switches I planned to lube them with Krytox 205g0 (the most common lube but some switches go better with the different lubes) and install housing films. There’s many videos on YouTube showing the difference between lubed/unlubed filmed/unfilmed switches and it’s clear that this improves the sound and feel. There are a few different film products which really only differ in thickness. Some switches have less stem wobble because the housing fits tightly so for those you want a thinner film.
To do the lubing and filming of my switches I purchased switch films, lube, a small brush, tweezers, a 4 prong jeweler holder, and a switch opener.
Stabilizers
For the wide keys of a keyboard you need a stabilizer to keep the key from wobbling. For the 75% layout that meant a stabilizer for left shift, space, enter and backspace. I ordered these stabilizers on Amazon along with washers to prevent the possibility of shorting the PCB. Lubing stabilizers as shown in this video is also recommended to eliminate the rattle sound the wire makes when you press a key.
Keycaps
Like switches there are tons of keycap sets which have different profiles, styles, and vendors. Most keycaps no matter the brand should fit onto the plus sign looking stems of pretty much all switches. The most common keycap profile (shape) is Cherry which is what my old board had, so I stayed with that and got these EnjoyPBT ABS Doubleshot keycaps. I have to say that the difference in sound and feel between the stock keycaps on my Coolermaster TKL and these ABS doubleshot keycaps is stunning. I think the Coolermaster keycaps are ABS plastic as well but they’re much thinner. I also ordered these PBT keycaps off Amazon which were pretty inexpensive and felt great too.
The most sought after keycap sets are manufactured by GMK but they’re never in stock so you have to order them through a group buy and then wait 6-10 months. There’s group buy for the GMK Space Cadet II keycap set which is based off the keyboard used on MIT’s Lisp machines. I had to get that and now I patiently wait.
Sourcing Components
Most components aren’t sold on Amazon so if you’re based in the US I would check out these retailers since whatever they have in stock will ship sooner than KBDFans who ship from China:
My case, plate & PCB are manufactured and sold by KBDFans but luckily mechanicalkeyboards.com had them in stock. Once you receive the case & PCB, make sure they arrived with the correct screws and also test the PCB (see below). It sucks to realize that something is missing that prevents you from finishing the build.
Building
There’s plenty of guides on how to build a keyboard but below are the steps with some of my notes as well as the tools I used.
- Lube and film switches (optional)
Lubing and filming was pretty slow and tedious. I went switch by switch taking it apart, lubing the housing, inserting the film, lubing the spring, lubing the stem, and then putting it together. It probably took me 4 hours for the set of 90. I recommend watching this Andy V Nguyen video on how to lube and film switches. Next time around I need to have a more efficent system.
-
Plug in PCB to test the switch contacts with tweezers to ensure that the keys register. I recommend downloading VIA for testing. You may need to flash new VIA compatible firmware onto your PCB with QMK if there are updates. I learned through the KBDFans Discord that in order for the RGB lighting to be controlled through VIA I had to flash new firmware. Unfortunately I couldn’t get QMK to work on Linux so had to install it on Windows.
-
Lube stabilizers as shown in this video
- Install stabilizers into PCB
It was tricky to know exactly where to screw in the stabilizers because there are many holes in the PCB, so I searched YouTube for a build video of the KBD75v2. Once the stabilizers are screwed in, plug the switches into them and then put keycaps on to test the sound and feel ensuring that there is no wobble or rattle in the stabilizers.
- Snap the plate onto the switches with stabilizers
At this point you may want to solder the existing switches into the PCB (more on soldering below) because otherwise the PCB and plate won’t stay together as you snap in more switches in the next step. Alternatively a clamp of some kind could have solved this.
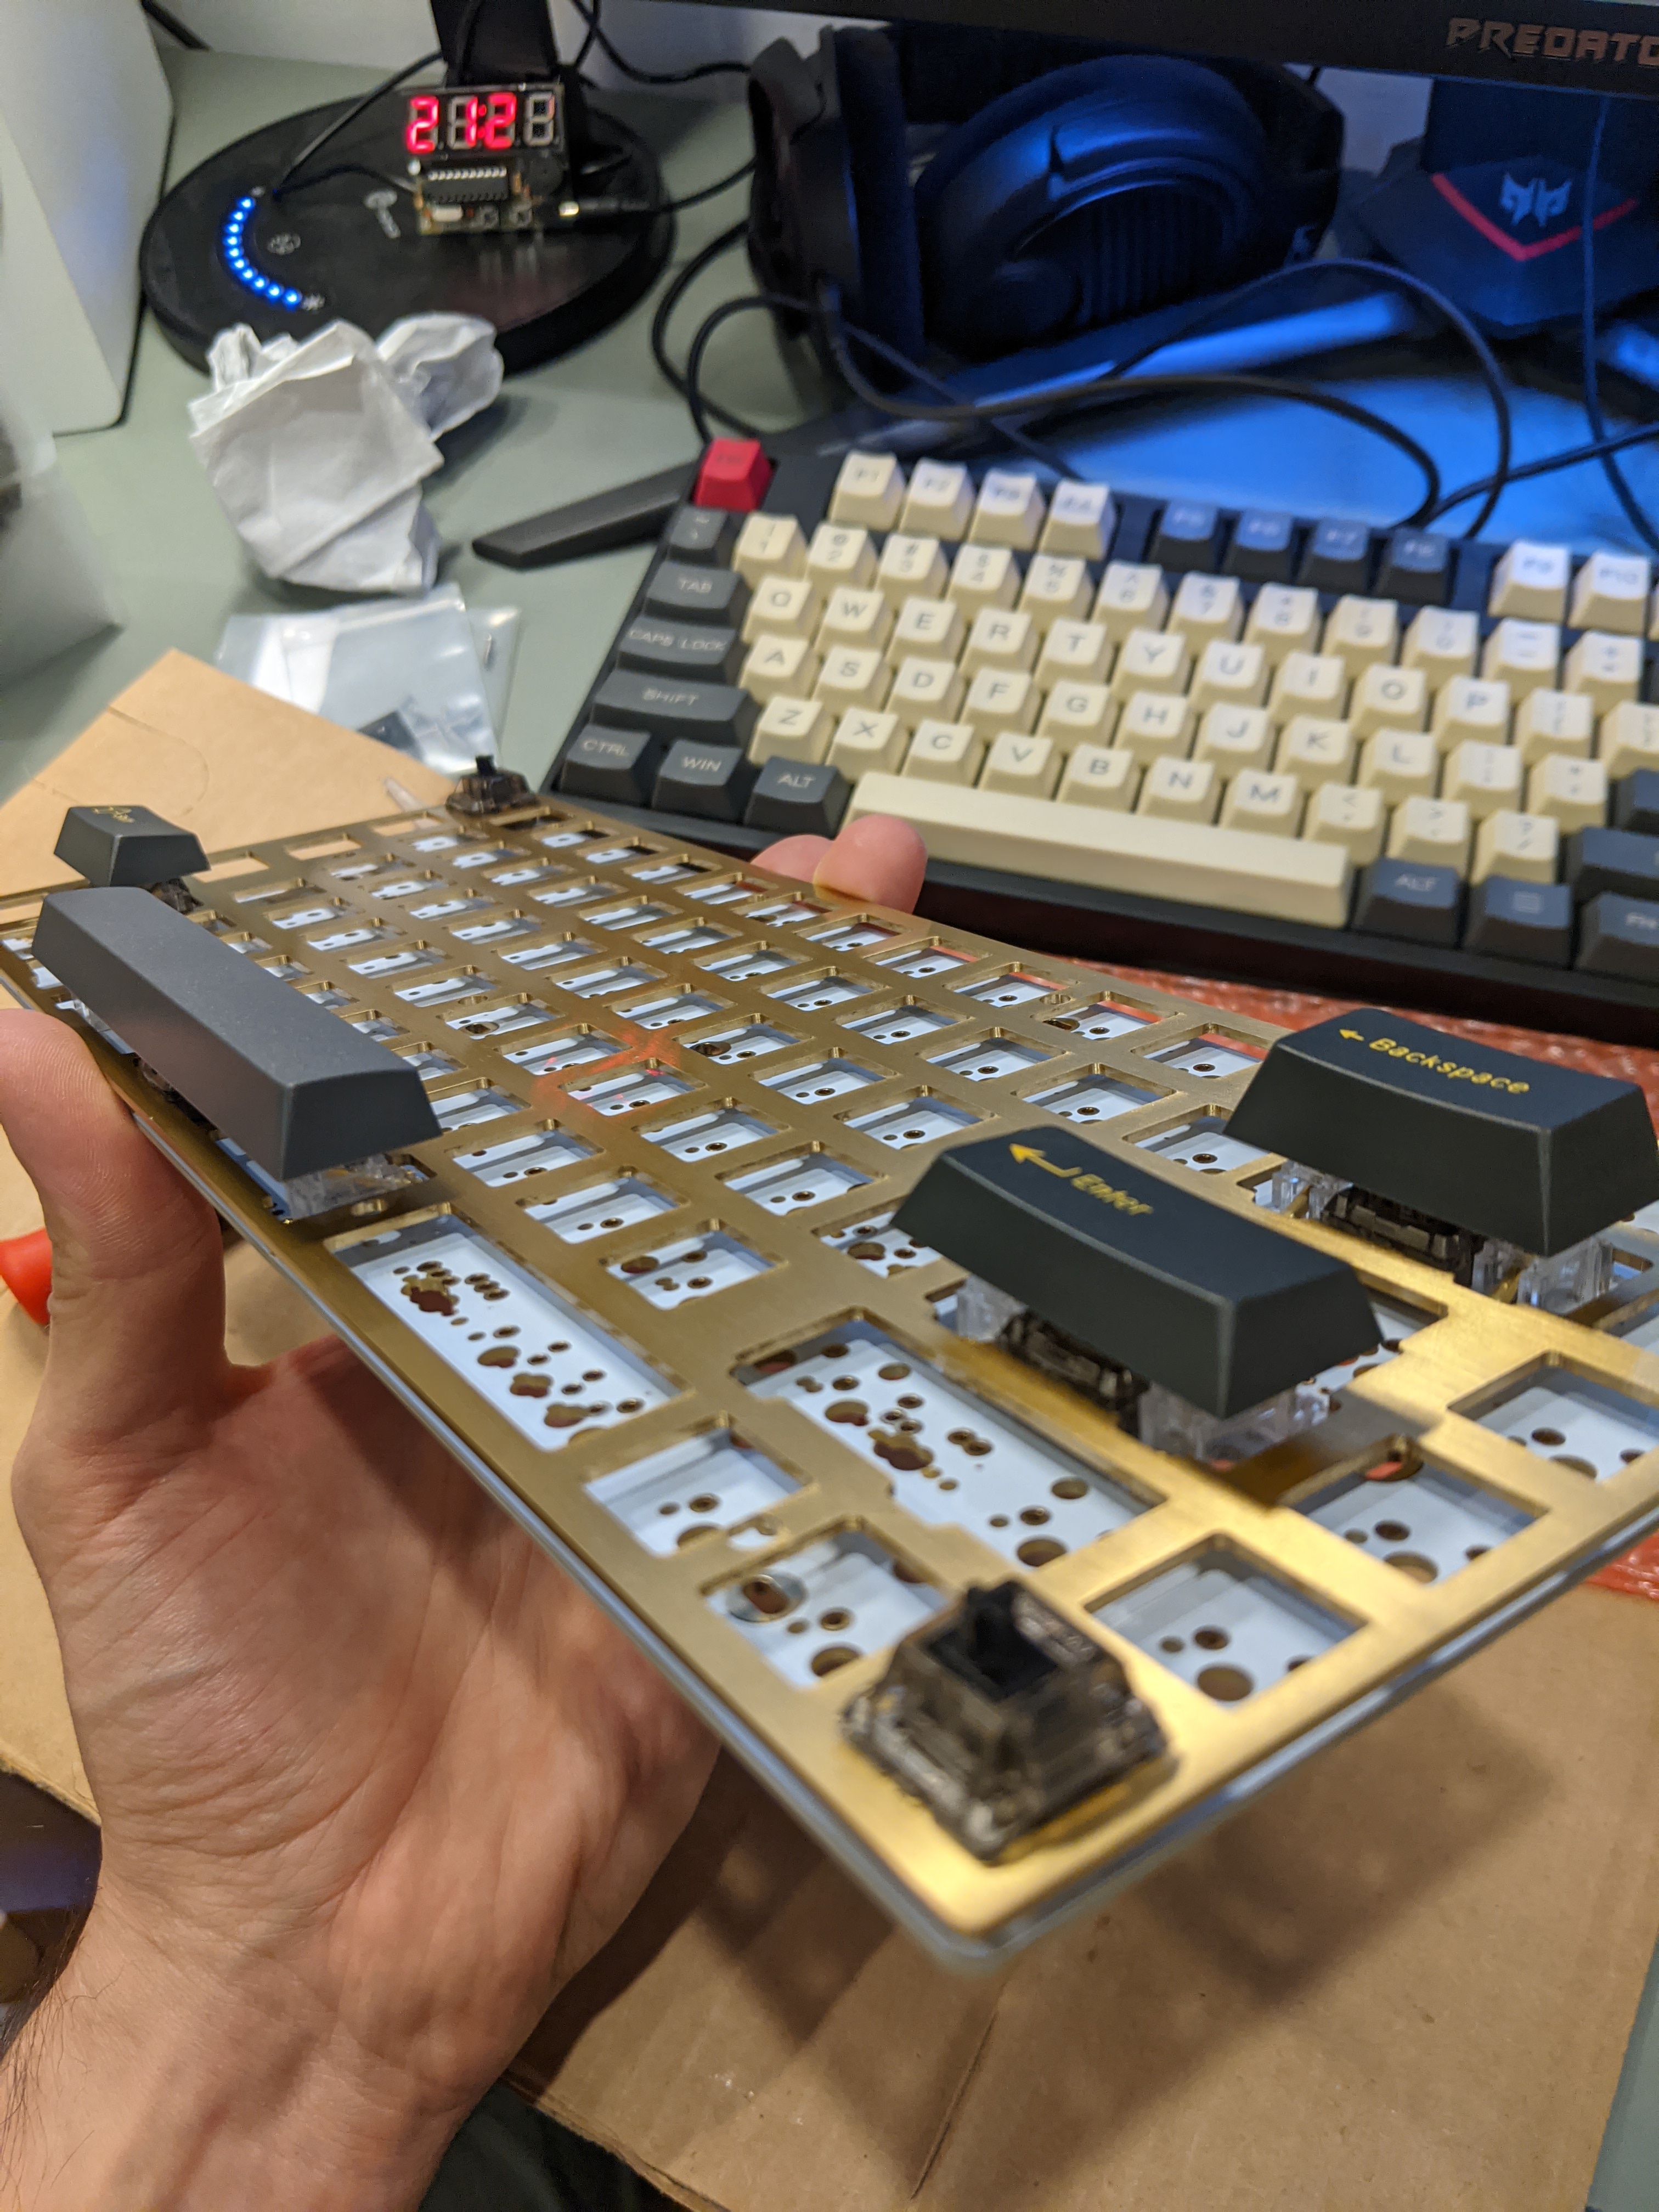
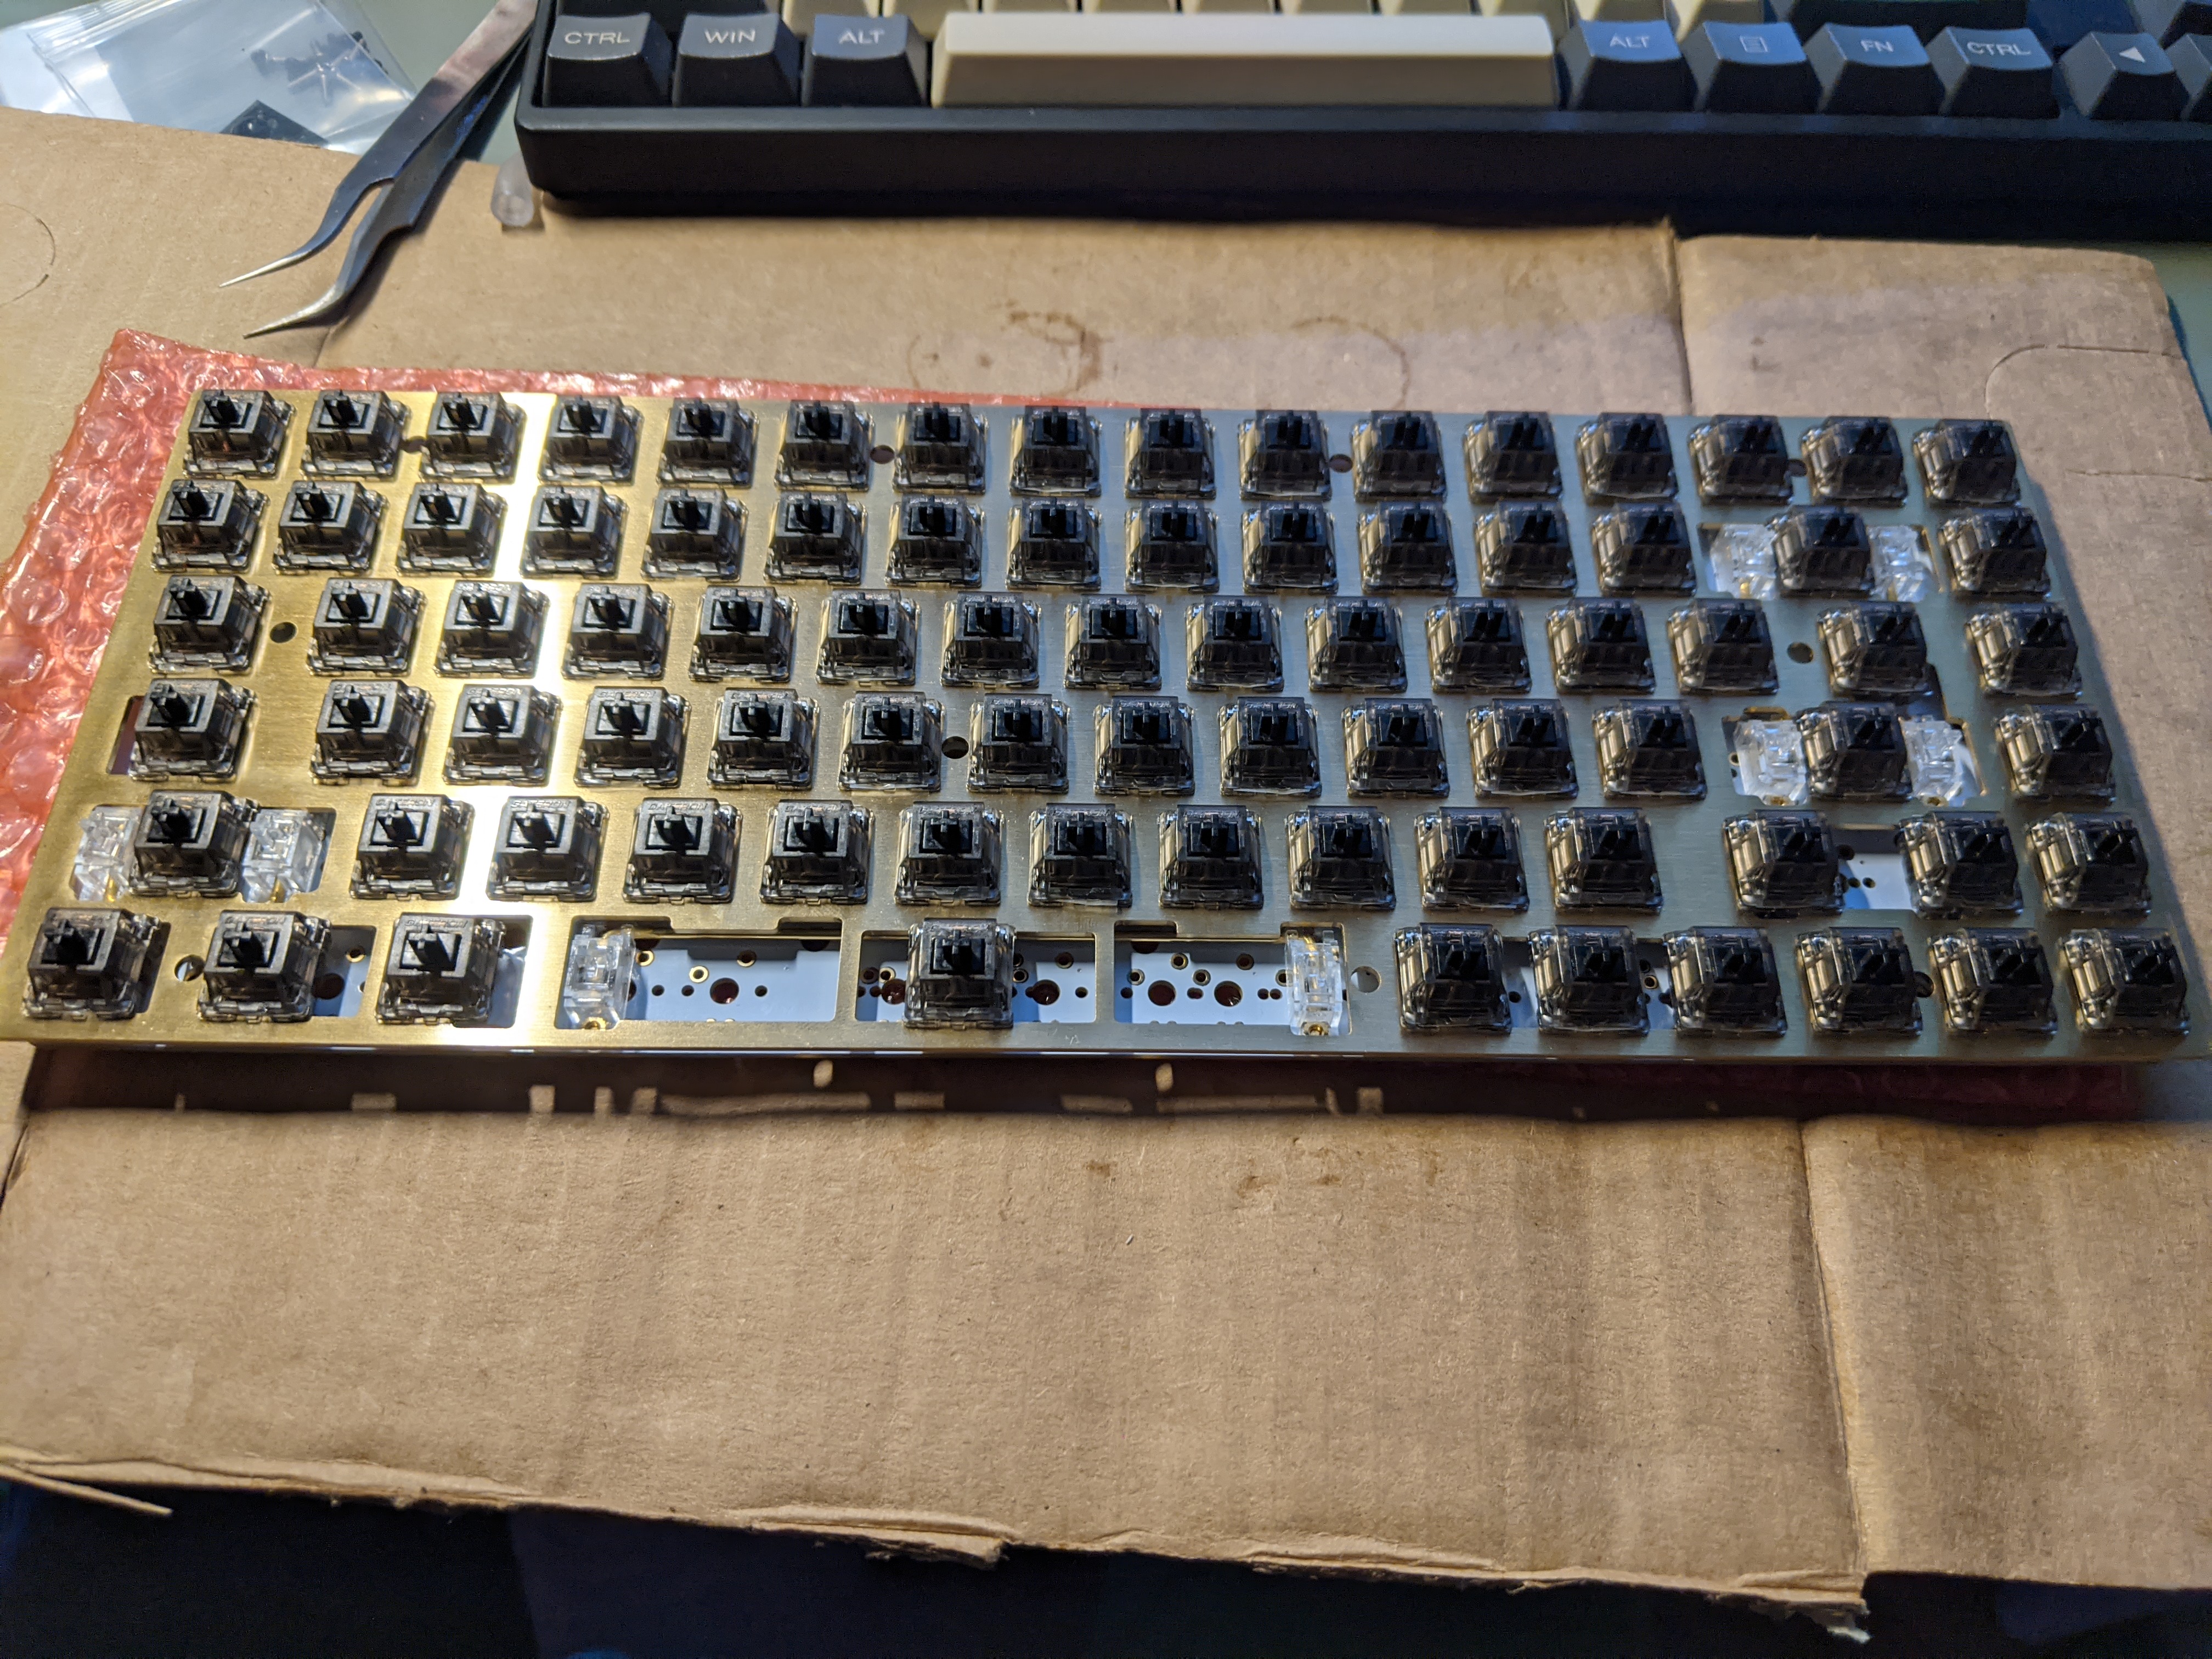
- Snap the rest of the switches into the plate and PCB
Be careful here because it’s easy to have a switch pin miss the hole and then get bent flat. So as you snap in every switch make sure the pins are sticking through the holes, if not pull the switch out with a switch puller, fix the pin, and try again. Thankfully the pins felt pretty durable and bending one didn’t mean it was broken.

- Solder the switches into the plate (unless you have a hotswap PCB)
This was the exciting part for me because I’m a novice at soldering. I figured I’d probably want to build another keyboard in the future as well as do other soldering work so I invested in this soldering station as well as a fume absorber. I practiced soldering first on this digital clock kit which didn’t have great instructions but was easy to do once I followed a video. I recommend a pair of clippers to cut the wires in the clock kit. I also recommend wearing a mask, gloves and eye protection because solder contains lead and the fumes are no good.
Before soldering the keyboard I recommend watching a tutorial video. Purchase a solder sucker in case you need to redo a solder hole. I bought it just in case thinking I wouldn’t use it, but there were a few holes I felt I did a poor job so I redid them. Solder cleaning wick may also be handly to clean up remaining solder that the sucker didn’t get, however I didn’t need to use it.
I learned that after finishing the solder job it’s also good to brush the bottom of the PCB with isopropyl alcohol using a toothbrush and q-tips. Apparently the flux in the solder can splatter onto the PCB and slowly cause corrosion.
I promise I did a good job soldering but didn’t take a photo.
- Plug the PCB in and test the keys
Just in case a key isn’t soldered in well enough or you forgot
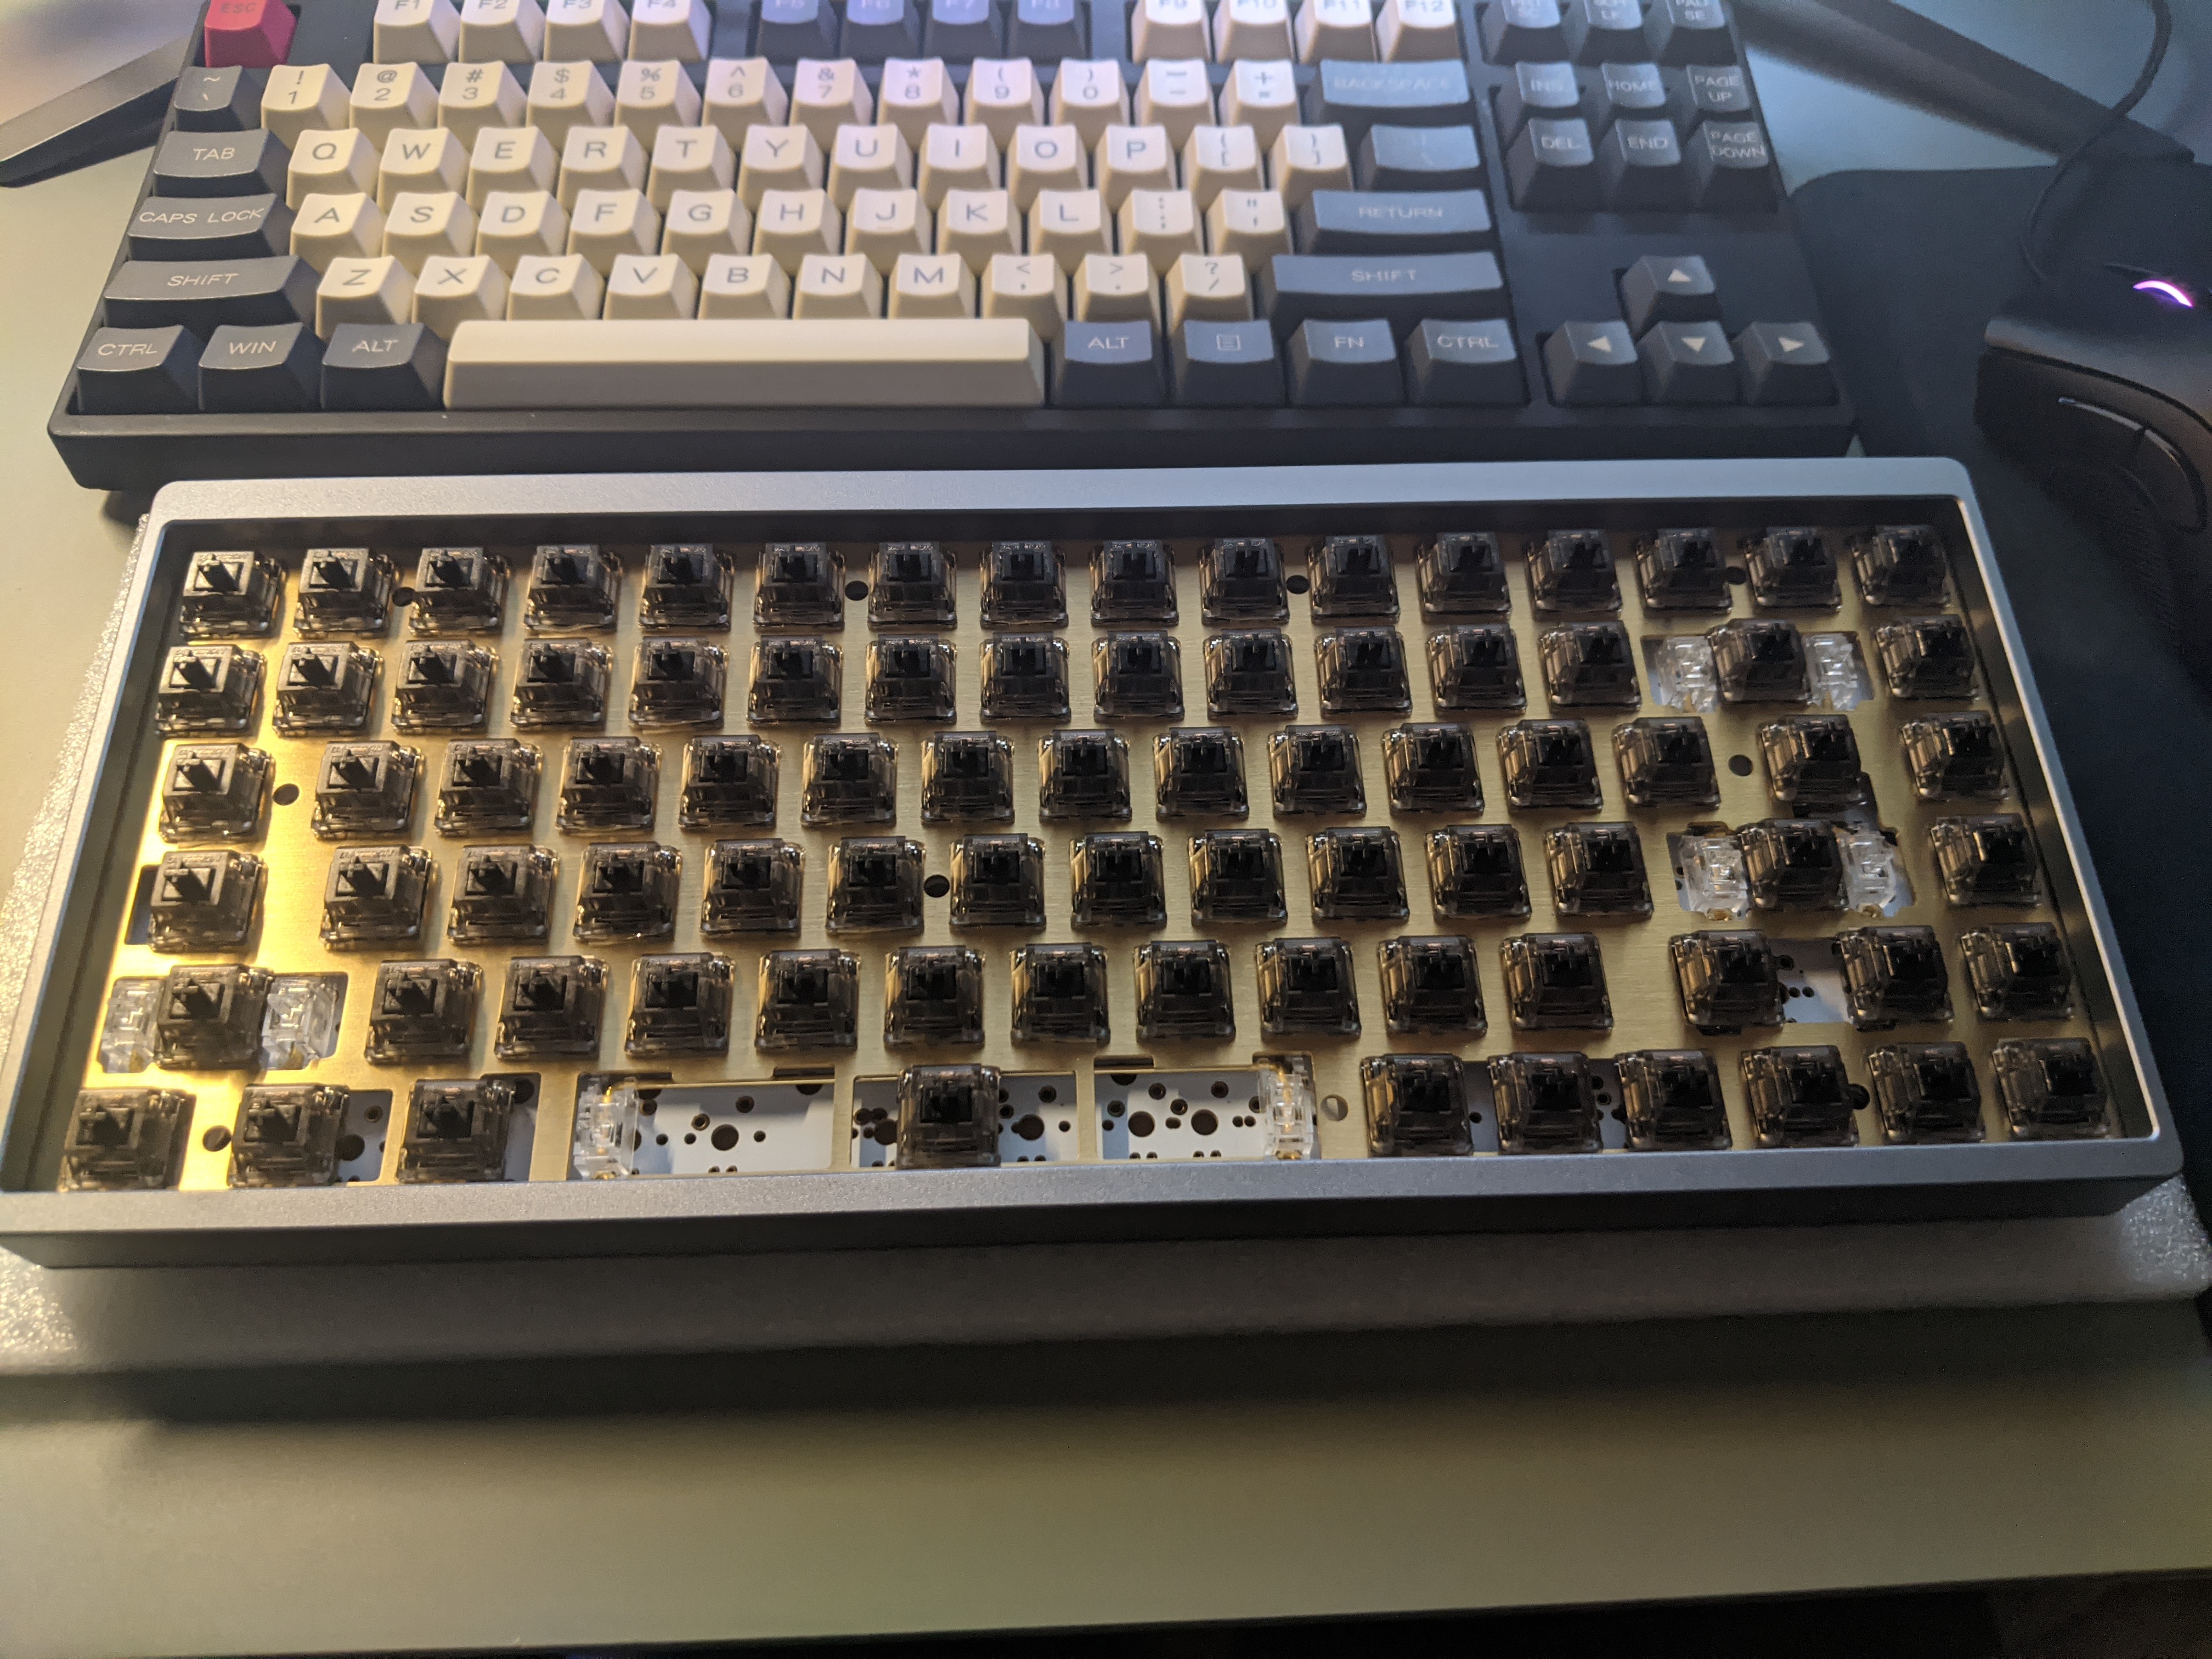
- Install PCB w/ plate into the case
I had to order a new screwdriver set because the one I had wasn’t skinny enough to fit into the KBD75v2 case holes.
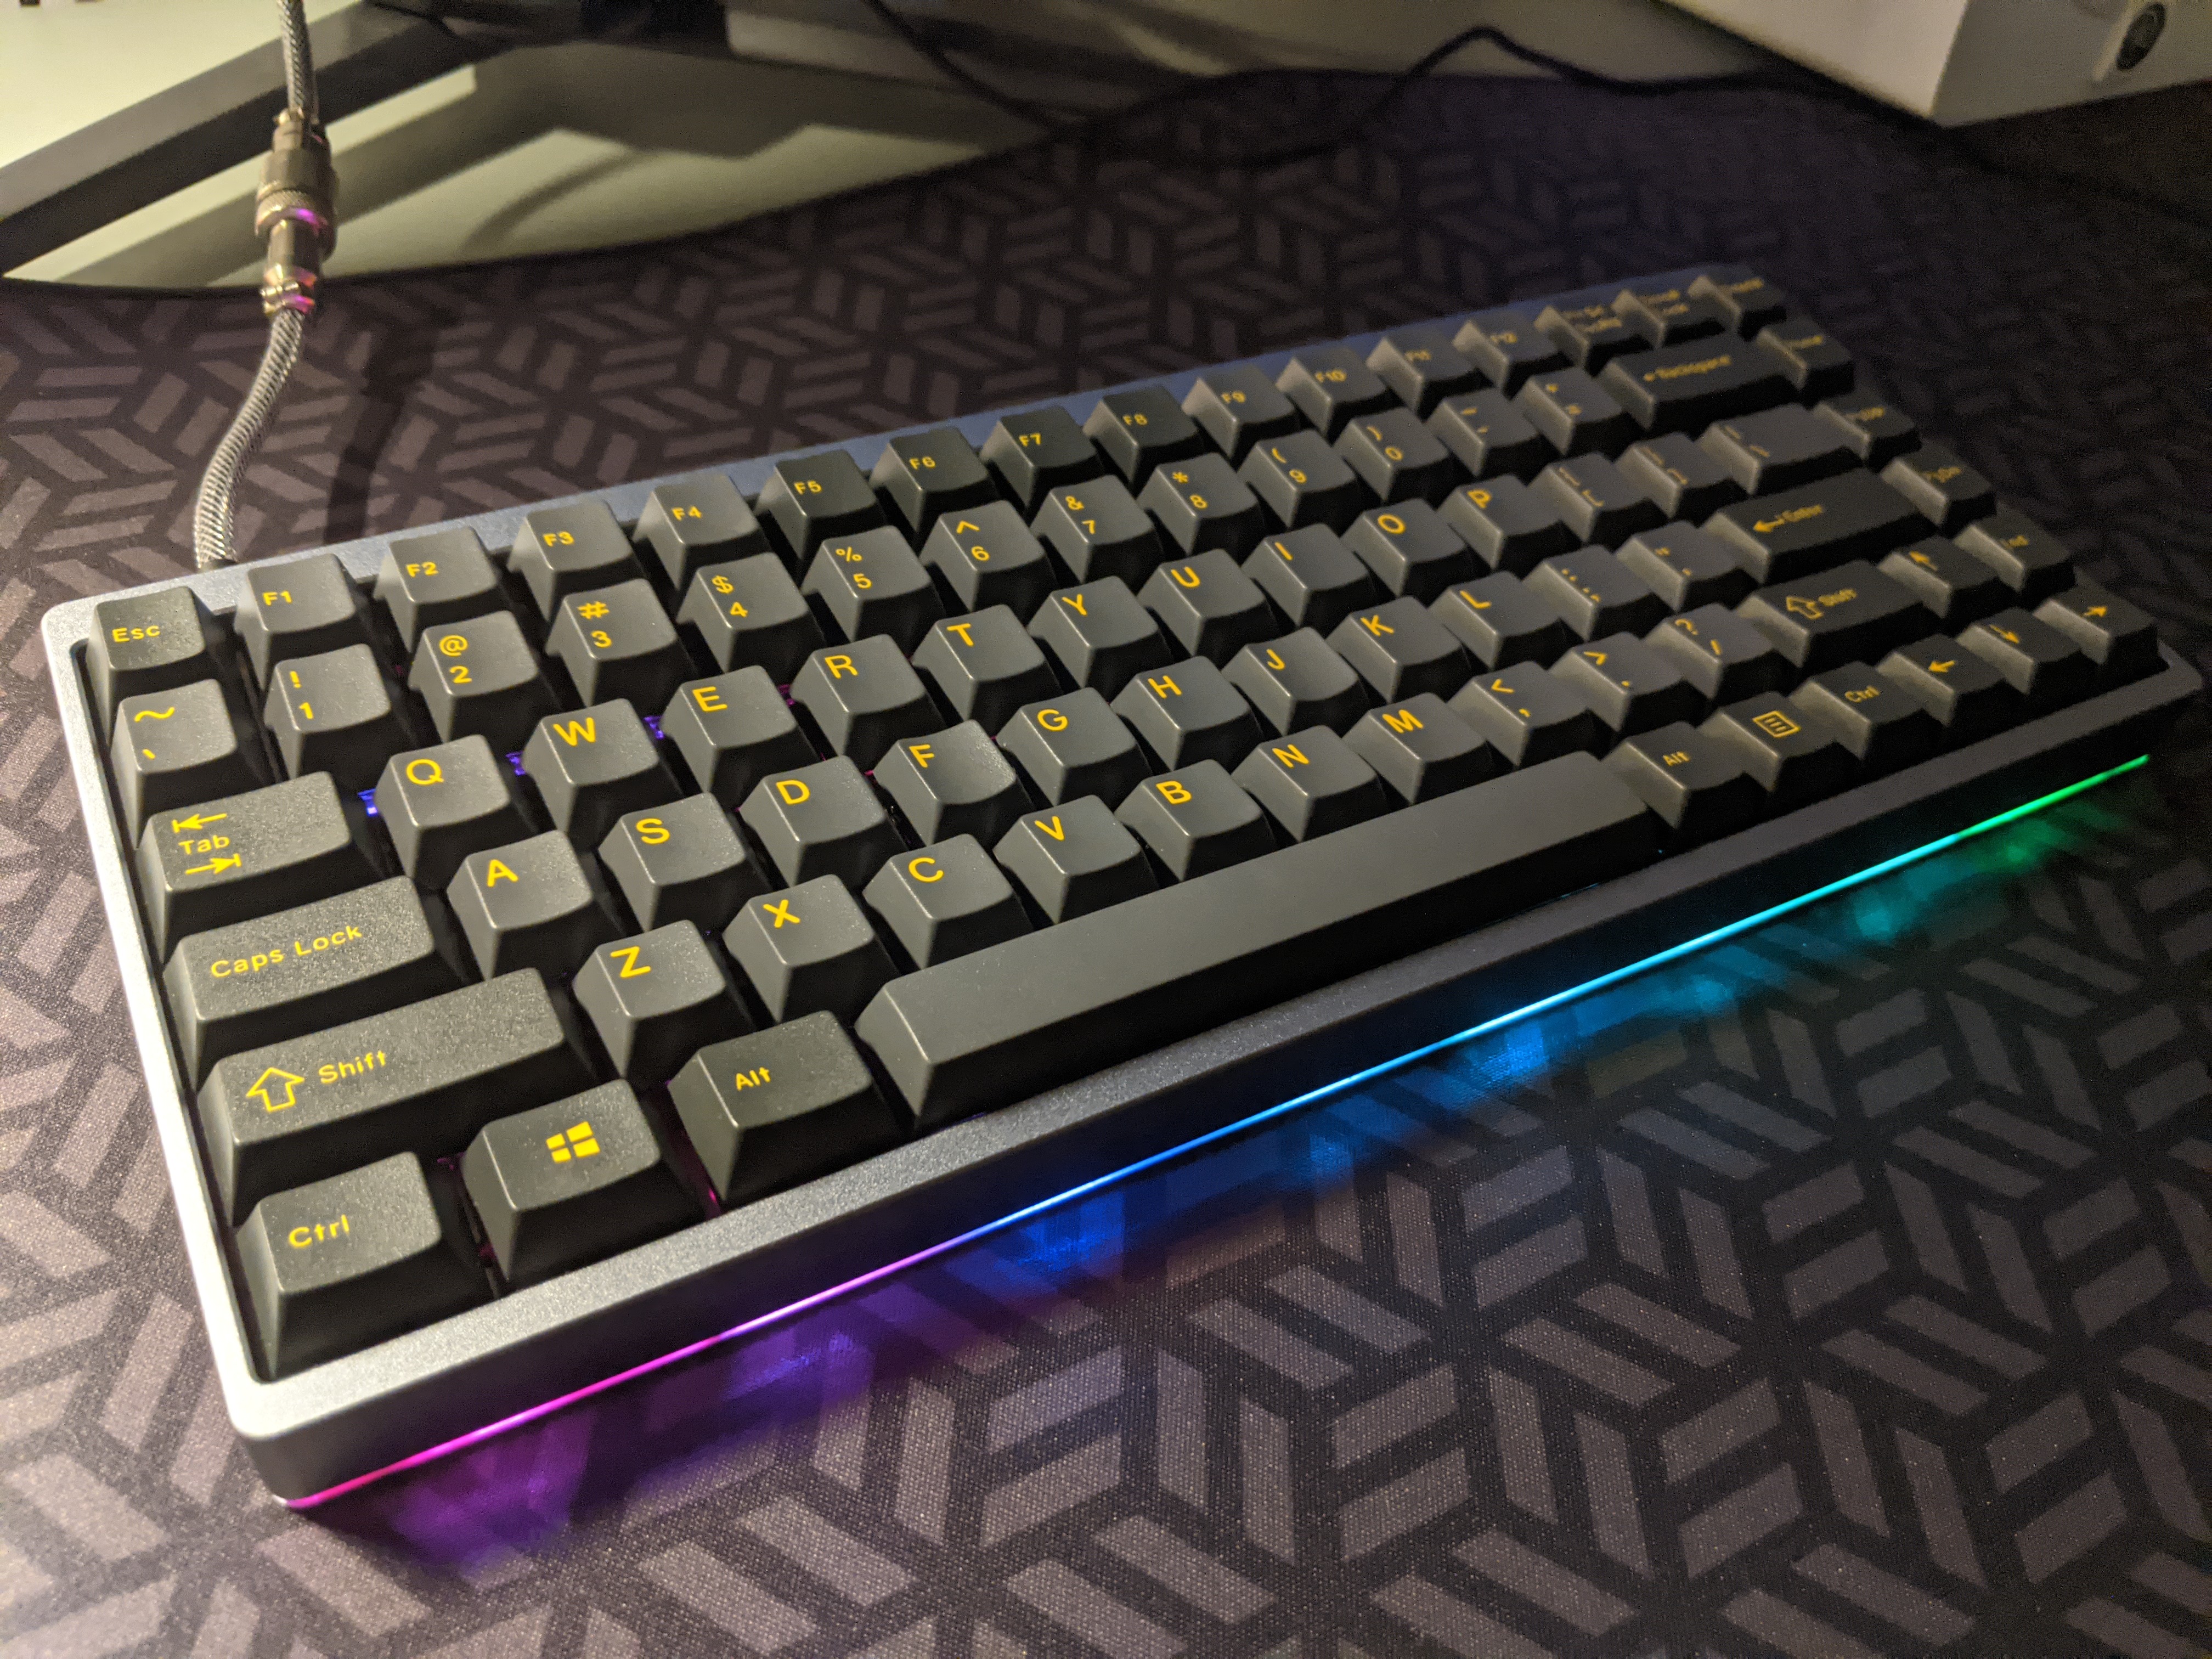
- Put the keycaps on and plug it in
- Type!
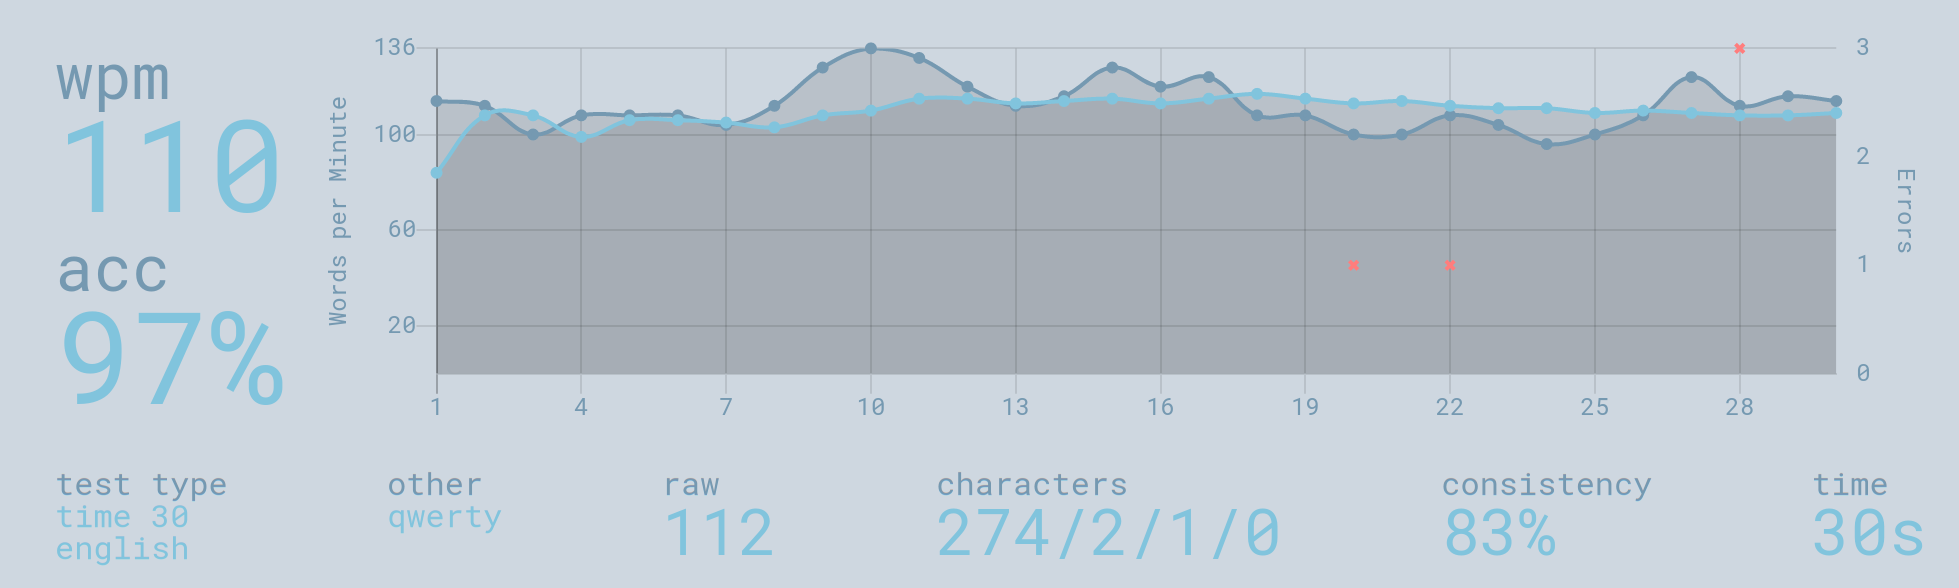
Go to monkeytype.com and enjoy!
Summary
I’m pretty happy with the end result. Going from a tactile clicky switch to a linear switch definitely makes a difference in my typing speed. The “thock” sound that the keys make is also very satisfying. It’s great to have the arrow and page navigation keys so close to my right hand. Overall there’s not much I would change except for a nicer looking keycap set.
Components
- KBD75v2 gray case and brass plate
- KBD75 Rev 2.0 PCB
- Stabilizers lubed with Krytox 205g0 and screwed in with washers
- 84x Gateron Black Ink switches lubed with Krytox 205g0 with 0.15mm film
- EnjoyPBT ABS Doubleshot keycaps
- Any USB-C cable
Tools (recommended by Andy V Nguyen)